
DRAGONFLY
My most recent work was a contribution to a project called Dragonfly, an online drawing school, where I created a range of 3D models for their website to help decorate the page and visually emphasize different lesson topics.
First draft versions were delivered in just 3 days, then following the additional discussion, we decided to pivot from the initial toon style to realistic look, and that’s where the rest of the time went.
The whole project was completed in 2 weeks (well ahead of the 1 month deadline) totaling 68 hours of work.
~ BREAKDOWN SECTION ~
For this project, I decided to explore a technique used a lot in big VFX productions - displacement. I've always been fascinated with the technique and finally found the place to try it.
When your model has evenly distributed polygons, using height maps allows you to deform geometry on a render level instead of modifying the mesh directly. This approach reduces viewport load, saves computational resources, and most importantly, speeds up iteration.
For example, if you receive feedback asking for additional surface detail (not just normal map information, but actual geometric changes) it’s far more time efficient to adjust/repaint the displacement texture than to redo sculpting/UVs/texturing passes from scratch. The texture basically tells the render engine how and where the geometry should be deformed.
Half of the models on this project were crafted using this technique.


Pyramid & Primitives
Can't say much about these, as the geometry here is pretty simple.


Screws
The first model where I used displacement.
After we decided to add rust to the screws, I wanted it to feel interesting while zooming in - to see that the rust actually is a real geometry, rather than just flat yellow-orange paint.
So it was just a few layers of noise that made the job done. Rust color variations were also driven by those noise masks.


Spoon
Same for the engraving on the spoon: hand painted B/W mask -> Displacement.

Cone
Idea: with a help of Three.js use the cone as an interactive model to make it possible for an end user to turn on/off individual light sources around the model to see how shadows change right on a screen.


Egg & Paper
Main task was to fully recreate the lightness of the composition from the concept.
My initial plan was to use Marvelous Designer treating paper as a cloth. But getting these nice micro details from the concept turned out to be an impossible task to do within MD. So then I switched my approach to Blender + ZBrush.

Inside Blender I blocked out basic shape, ZBrush helped to add micro folds, and Substance - macro folds by creating a height map. Finally, inside Marmoset the subdivided paper was displaced with the height map and blue-toned subsurface scattering was added to get the desired lightness feel.

Cylinders
Idea: to show the differences in physical properties of materials.
Geo-wise there's nothing to talk about obviously, but texturing was a bit tricky. For the final version (with signs of wear) I've decided not to use sculpting at all but to make everything using height maps and displacing. Even the crack on the wood part was just a thoughtful painting work.


Coins
For these I prepared lots of self made/provided/extracted from Ebay listings alpha masks to sculpt coins in ZBrush.


Design of the Asian one is my personal homage to Shrek medals from around 2008.

Cubes
The approach used here was same as for coins: finding the right font -> preparing alpha masks of an alphabet -> ZBrush -> texturing.


Lollipops
Same for lollipops: creating masks for ZBrush -> extruding geo.


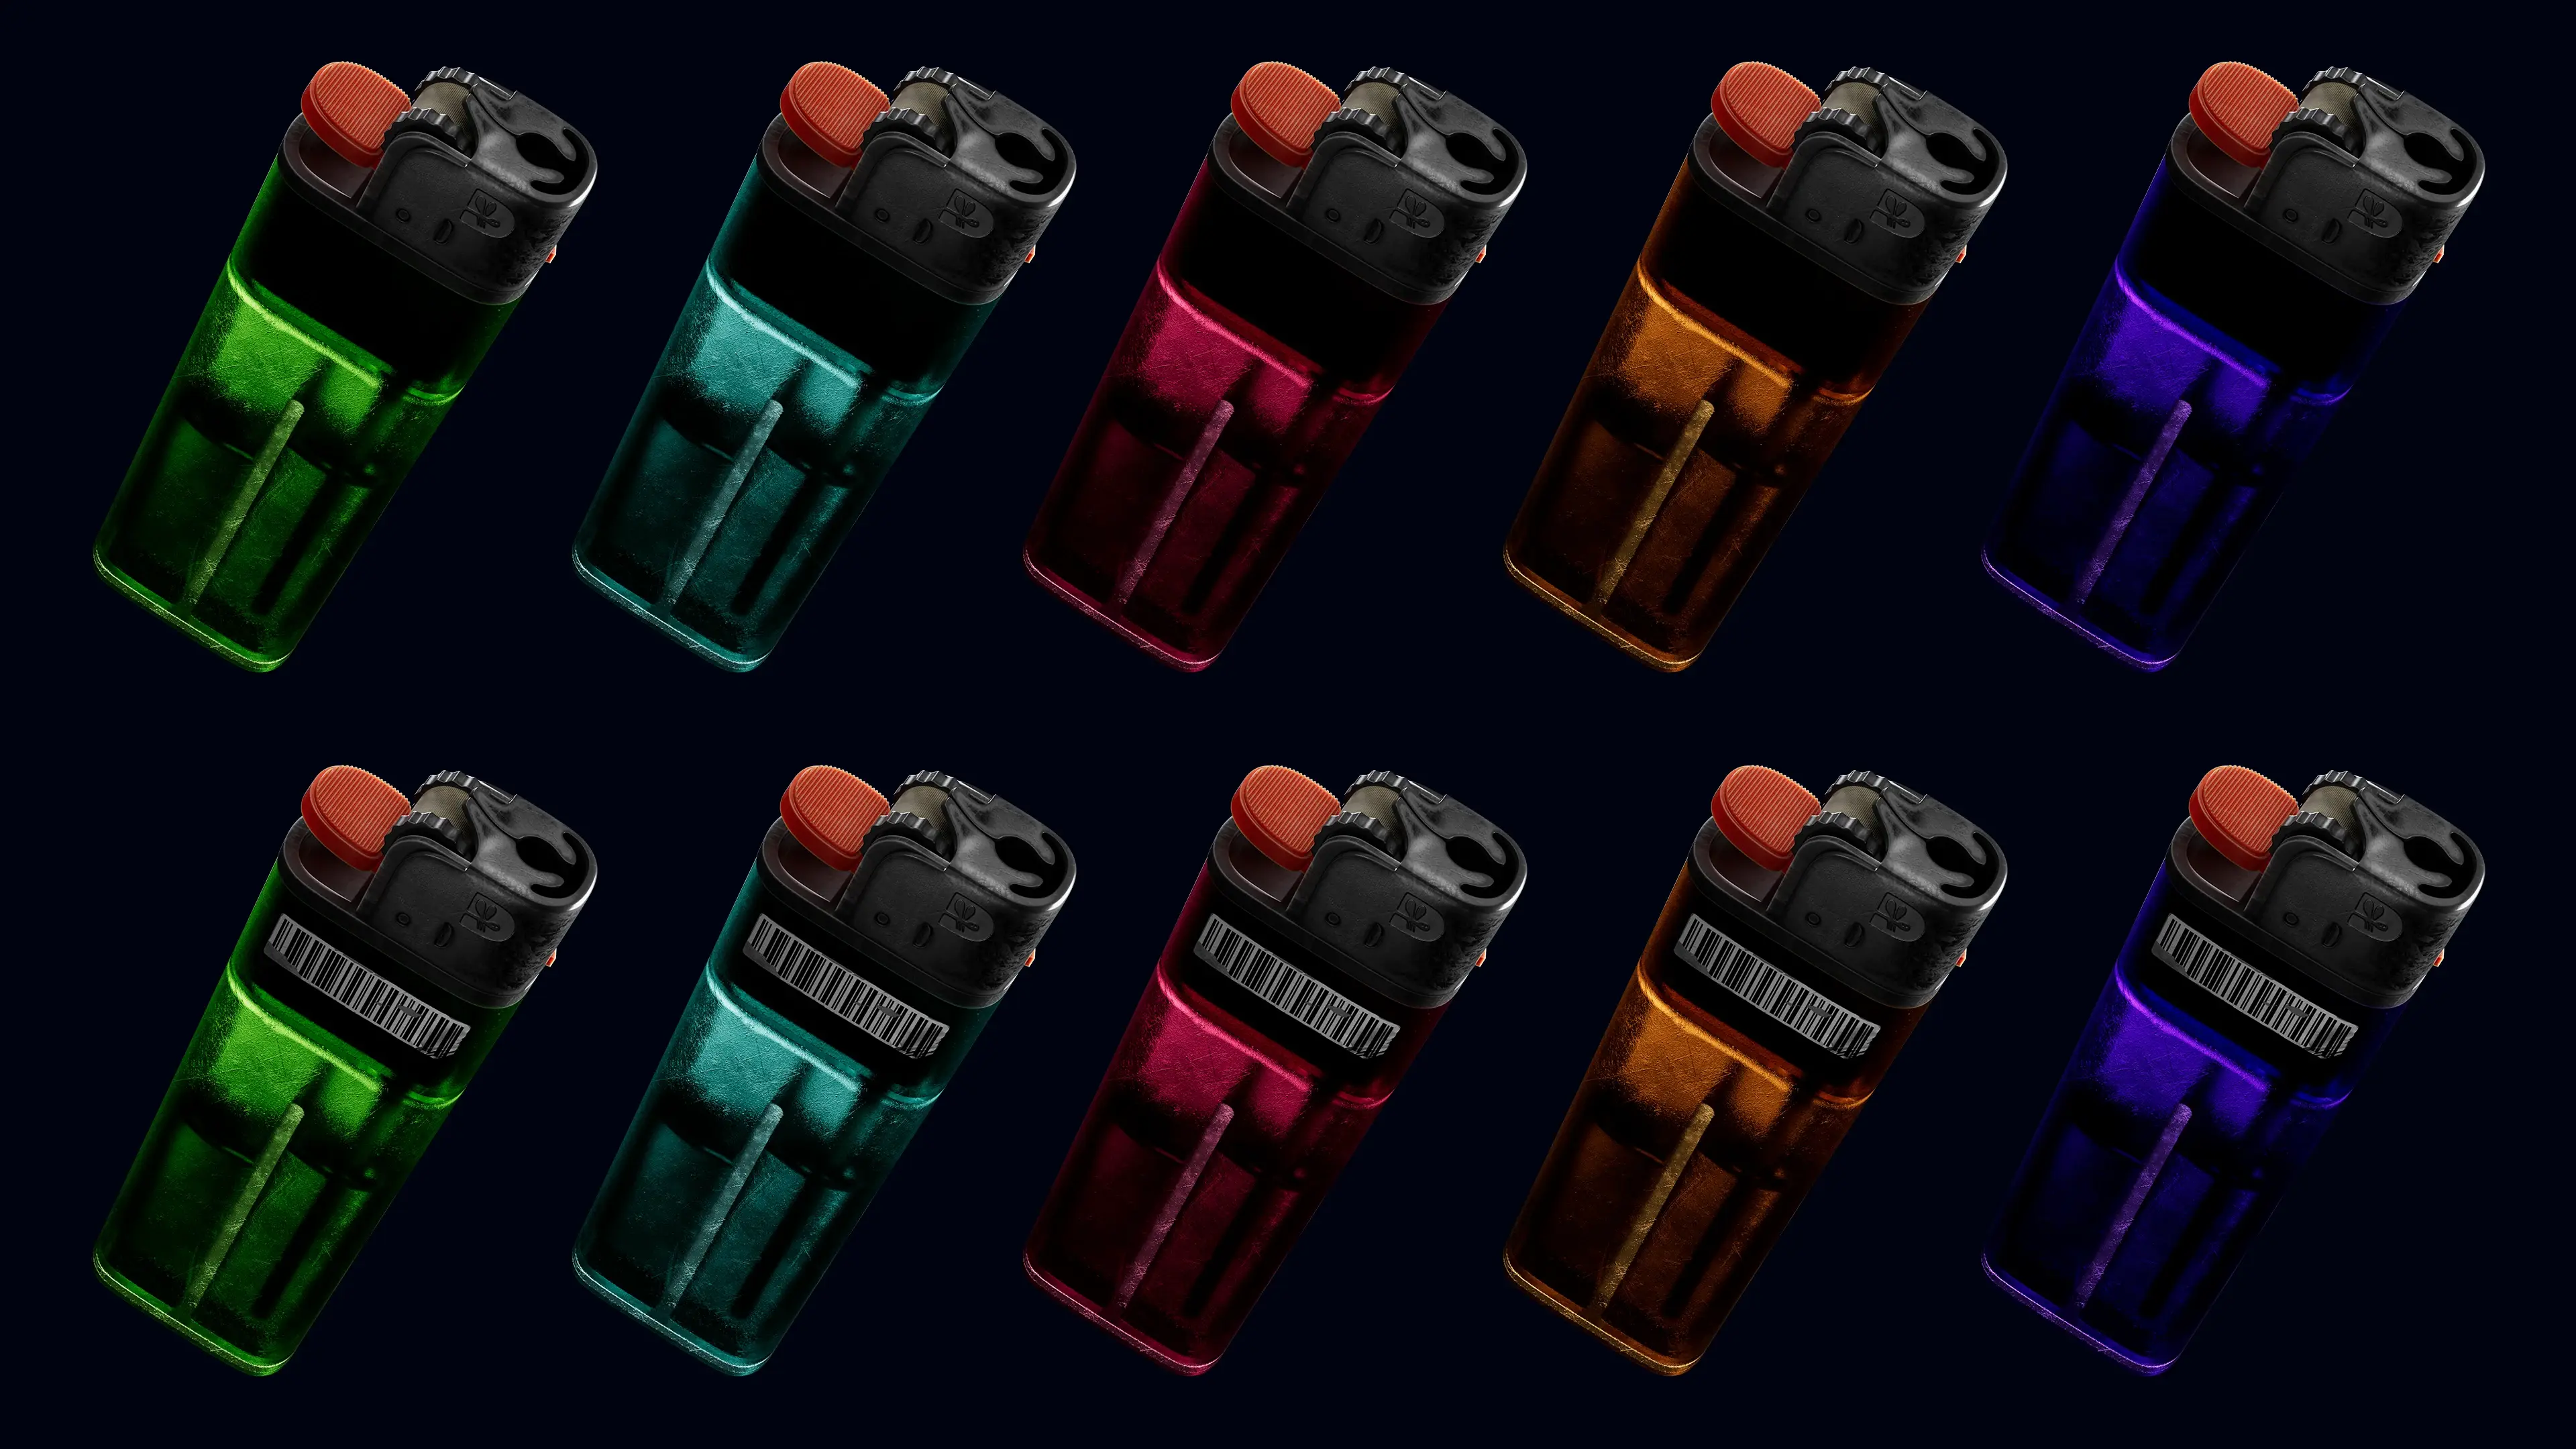
Lighter
That was the hardest one. As a daily driver of Marmoset Toolbag I was kind of surprised that it can't render layered refractions. As seen on the picture bellow (draft version) liquid inside the lighter looks muddy and not transparent at all.
So after going back and forth, the best decision was to come back to the roots so to speak, and use Blender for rendering. I've mixed two shaders (Principled BSDF & Glass shader) using the mask painted in Substance, excluding top part and barcode from transparency pass. I also layered scratches on the transparent part for light to behave in a more realistic way and voila!

Pin
Again, nothing fancy here. Blocking main shape -> ZBrush detailing (metal creases) -> texturing. On the final design iteration was decided to add the school's logo (just normal map, zero geometry altering).

Pencil
The final boss of displacement. The model itself wasn't a hard thing to do (simple 6-sided cylinder), so i wanted to make it more catchy on a micro level following the main 3D rule for obtaining realism: to break straight lines.
Finding the right approach for pencil "sharpening" was not an easy thing too. At first, I tried placing lots of cubes around the tip and using booleans cut the pencil, but...
Final pipeline was: pencil in "factory new" condition was made inside Blender -> ZBrush was used for sharpening -> back to Blender, the model was unwrapped as three separated material blocks (pencil lead, raw wood and wrapping) -> texturing in Substance with LOTS of noise layers to make proper height maps to push geometry and get those micro details on final render I wanted.
